Proxmox VM Image Templates
Introduction
Creating Proxmox virtual machines can be done either manually by uploading an iso image and going through the installation steps or very quickly by simply cloning an existing virtual machine image template.
We are outlining two different approaches: manually and through a script. The script setup is recommended because it takes the configuration further while the manual steps are a quick way to create a non-ubuntu or debian image.
Building packages with scripts
A well thought out process has been documented in trfore's blog post Golden Images and Proxmox Templates Using cloud-init.
Enabling snippets
Proxmox knows the concept of snippets. To enable them via the GUI, go to Data Center -> Storage -> local and click on edit. Then select Snippets from the dropdown.
Repeat these steps for cephfs so that we also have a shared snippet directory.
Automatically creating VM templates with Packer
Packer allows us to build and configure templates in an automated fashion.
Building the image
First make sure that no template or VM exists with the id 123 already since this would fail the build step.
git clone https://github.com/davosian/siebensprung-proxmox-templates.git
cd siebensprung-proxmox-templates/packer/ubuntu-2404
cp variables.pkrvars.hcl.example variables.pkrvars.hcl
Update the variables in variables.pkrvars.hcl with actual values. To get an API token, go to https://prox-h1:8006/#v1:0:18:4:=certificates:=contentImages:::::=apitokens and create an new token. Make sure to disable priviledge separation.
Then trigger the build as follows (example is for Ubuntu 24.04 LTS):
packer init .
packer build -var-file=variables.pkrvars.hcl ubuntu-24.04.pkr.hcl
You will end up with a new template.
Manually creating VM templates
Manually creating an image template can be done in two ways:
Creating a template from an existing virtual machine
This approach is helpful if you want to create new images based on an existing virtual machine. This is ideal if the linux distro is not supported by the script below or if you want a quick way to create a template without putting too much effort into automating the creation of that template.
Creating a template from a cloud image
Alternatively, you can create templates from scratch by starting with a cloud image and turning it into a virtual machine template. Along the way you can tweak it with some cloud init configuration.
The advantage of this approach is that cloud images are always up to date and give you a clean [[virtual machine]] with just some basic configuration like [[ssh keys]] to start from.
The following resources were helpful along the way:
- Proxmox Cloud Init made easy with Ubuntu 24.04
- Create an Ubuntu Cloud-Init Template on Proxmox: The Command Line Guide
- Making a Ubuntu 24.04 VM Template for Proxmox and CloudInit
The following steps are based on the video resource above (link to the YouTuber's website was not working at the time).
Uploading the iso image
- Copy the URL to the latest Ubuntu LTS cloud image (pick the version ending in
-amd64.img) - On the Proxmox host, go to
prox-h1 -> cephfs -> ISO imagesand click onDownload from URL - Paste in the URL from step 1 and click on
Query URL - Under
Hash algorithmselectSHA-256 - Paste in the
Checksumfrom the file SHA256SUMS (find the right entry -> last one) - Click on
Download
Configuring the image
Next we have to modify the ISO to prepare it:
cd /mnt/pve/cephfs/template/iso
qm create 997 --memory 2048 --core 2 --name ubuntu-24.04 --net0 virtio,bridge=vmbr0,firewall=1
qm importdisk 997 noble-server-cloudimg-amd64.img ceph-data
qm set 997 --scsihw virtio-scsi-pci --scsi0 ceph-data:vm-997-disk-0
qm set 997 --ide2 ceph-data:cloudinit
qm set 997 --boot c --bootdisk scsi0
qm set 997 --serial0 socket --vga serial0

qm set 997 --ipconfig0 ip=dhcp
qm set 997 --ciuser davosian --cipassword 'yourpassword'
Make sure the password is set correctly in the command above.
In the Proxmox UI change Hardware -> Processors -> Type to host. On Cloud-Init, enter the SSH public key (PatschifigPro from the local machine).
Turning the ISO into a Template
This step is easy: right-click the virtual machine and select Convert to template or run qm template 997.
Initial setup in a new VM
Once the template is ready, we can clone it to other virtual machines and finalize the installation in there. This is only necessary in this manual approach.
qm clone 997 201 --name "new-ubuntu-vm"
qm set 201 --memory 4096 --cores 4
qm start 201
Wait for the VM to start up, then connect to it through the Proxmox console. Log in with the credentials from the template.
Install QEMU guest agent:
sudo apt update
sudo apt install -y qemu-guest-agent
sudo systemctl start qemu-guest-agent
sudo reboot
The script in the next chapter takes care of these steps in an automatic way.
Background on the scripts
There are two bash scripts proxmox-create-debian-cloud-template.sh, proxmox-create-ubuntu-2204-cloud-template.sh and proxmox-create-ubuntu-2404-cloud-template.sh that automatically pull the latest cloud image for Debian 12 or Ubuntu 22.04 / 24.04 and prepare them for templates. These scripts are maintained in the Github repository https://github.com/davosian/siebensprung-proxmox-templates and are located on the Proxmox nodes inside the Ceph shared directory /mnt/pve/cephfs.
You can find these images inside Proxmox on one of the nodes:
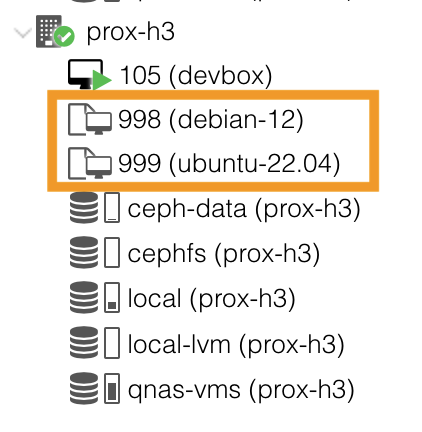
For the scripts to work, the key devkey.pub needs to reside in /mnt/pve/cephfs/. This key is used to configure SSH access to the newly created machines from the Proxmox devbox. You can find the key SSH Proxmox inside of 1Password.
Updating the images
Note: the scripts below fail if the template does not already exist. If this is the case, comment out the following section inside the script:
# delete existing VM
qm destroy $VMID
sleep 10
Debian
You can update the existing [[Debian]] 12 template as follows:
# navigate to the /root directory
cd ~

# update the template
/mnt/pve/cephfs/proxmox-create-debian-cloud-template.sh
Ubuntu
You can update the existing [[Ubuntu]] 22.04 template as follows:
# navigate to the /root directory
cd ~

# update the template
/mnt/pve/cephfs/proxmox-create-ubuntu-2204-cloud-template.sh
You can update the existing [[Ubuntu]] 24.04 template as follows:
# navigate to the /root directory
cd ~

# update the template
/mnt/pve/cephfs/proxmox-create-ubuntu-2404-cloud-template.sh